Setup

Setup instruction
also you can use BrainBay for PC.
http://www.psychiclab.net/IBVA/BrainBay.html
use with BrainBay, need to setup sampling frequency 256 Hz. need to change Arduino code for this.
about electrode cable :
one of company sale electrode: DBF3D77
in USA :
http://www.multibiosensors.com/
in EU :
http://www.medcat.nl/supplies/En/MBS.htm
also you can use different type of electrode. IBVA and brain-duino design is works with that way.
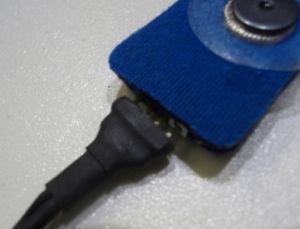
you need to put this electrode to cable electrode holder snap.
usually professional EEG device, people use new electrode for new client / subject.
not use old electrode, old electrode mean after one time used electrode.
IBVA and brain-duino works similar, very low noise amplifier with different electrode condition.
so, can use old electrode also.
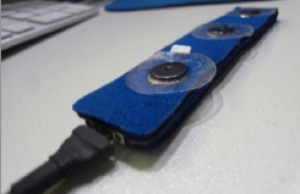
this photo headset cable set has a “ear clip” for body ground. use total 3 electrode.
http://www.psychiclab.net/IBVA/option.html
sample electrode holder and cable :
this is more experimental headset. need to care to use : don’t pull cable, etc. . and need to hold with head band and/or put all to some headgear.
this headset has no “ear clip”, and use center electrode for body ground. use total 5 electrode.
http://www.psychiclab.net/IBVA/electrode.html
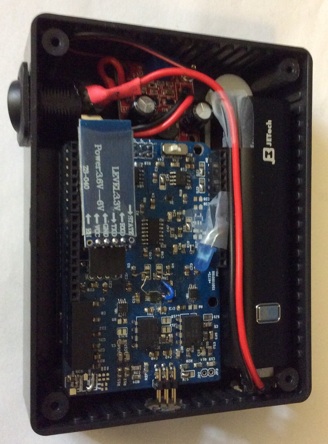
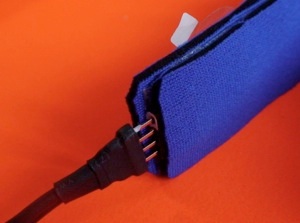
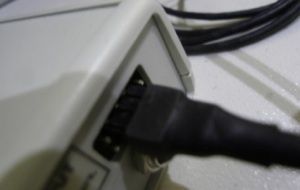
one other side has 6 pin connector. it’s has white dot mark. set it down and push to brain-duino input connector ( need to look PCB parts side is up, in the Box LED hole side is UP )
need to setup Bluetooth connection as followings.
this case Bluetooth port name is “brain-duinoB”
http://www.psychiclab.net/IBVAmanual/BluetoothSetup.html
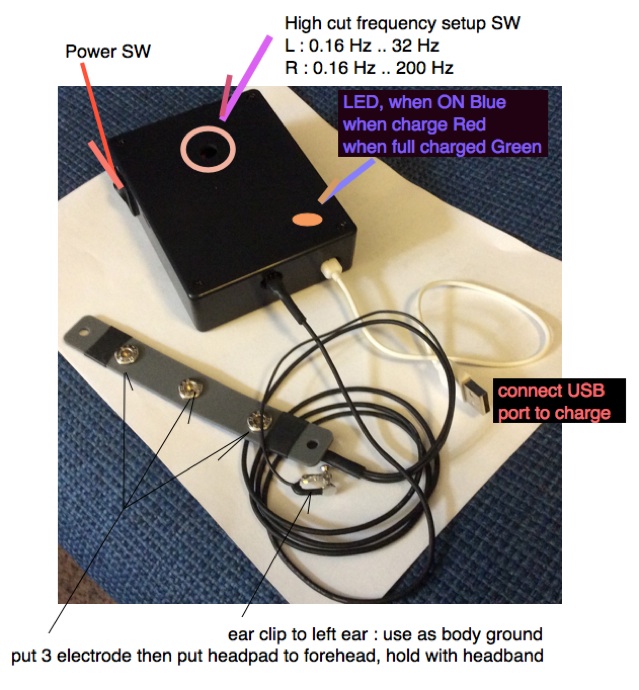
setup headpad and cable as following instruction.
cable has 4 pin connector in one side of cable. white dot to put it white dot mark of headset.
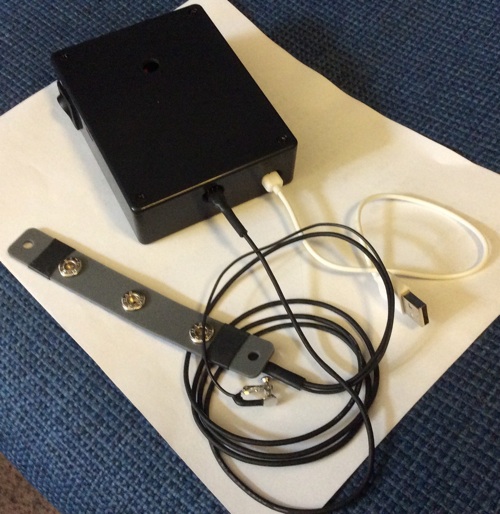
white USB cable for charge USB battery. need to charge Box before use it.
black cable for electrode and headset connection.
after setup headset, Power ON Box, run IBVA application.
1 : connect headset and cable
electrode and cable connection sample
http://www.psychiclab.net/IBVA/electrode.html
cable and electrode holder is recommended to make it by your self.
in case you like you can buy this Head Pad and cable also.
http://www.psychiclab.net/IBVA/option.html
2: battery connection and put it to BOX
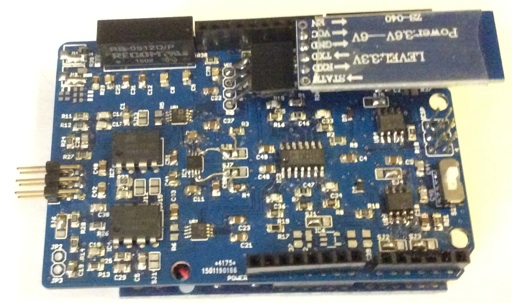
use USB battery, then DC-DC makes 5 V ( USB output ) to 7 V connect Arduino UNO.
in case you use Arduino Pro mini instead of UNO, then you can connect directly 5 V to Arduino 5 V input. this case no need to use DC-DC to make 7 V.
Arduino Pro mini doesn’t has Ref V pin. so need to change Arduino code for not use it.